HOW TO PAINT WITH MARIGOLDS

Natural dye paint samples! Top layer is unaltered marigold, middle layer is marigold adjusted to gray in an iron bath and the bottom layer is a marigold and madder mixed paint to make orange.
I’m so glad my marigolds have been growing out of control because it’s given me a chance to do some other fun natural dye experiments! My summer’s obsession is making dye paint out of my marigolds and hand painting fabric with them!
Have some marigolds you want to experiment with? Gather ye blooms and check out my notes on how I painted my In the Folds Playsuit below!
What You’ll Need:
Natural cloth (I used 100% linen for this project)
Fresh or dried marigolds
Small pot and hot plate (or stove top) to cook marigolds in*
Heat resistant cup or jar
Paint brush
Optional: Iron (ferrous sulfate) Powder and Aluminum Potassium Sulfate
*If making this in hot summer months, you can use the power of the sun instead of a hot plate to extract your color! See below in “Extract Your Marigold Dye” for more notes.
Extract Your Marigold Dye
Before you can get to painting, you have to extract the color from your marigolds. This involves a little cooking. Place enough marigolds in your pot to cover the bottom. You can use the entire flower head or just the blossoms, fresh or dried. Add water to your pot— just enough to cover the layer of blossoms. Place your pot on your hot plate or stove top and cook on low for about an hour.
If you’d rather use the power of the summer sun, place your pot of marigolds out in a sunny spot and let the summer’s heat do its magic! I’d leave the concoction in the sun for a couple of hours if choosing to extract color this way.
The water the marigolds are soaking in will transform to a clouding yellow color. That’s a great sign!

My marigolds soaking in the sun. I left them here for a couple of hours and then put them on my hot plate for about 30 minutes the next day..
Make Marigold Print Paste
Once you’ve extracted color from your marigolds, it’s time to thicken it up with some print paste! I use Botanical Colors’ Print Paste Thickener. It’s organic and super easy to use.
To make your print paste, simply strain out a few ounces of warm marigold dye into a heat resistant cup or jar. Sprinkle about half a tablespoon into your warm dye and stir, stir, stir. The powder will dissolve and the dye will thicken as it cools. You’re aiming for a consistency akin to something like thin ketchup. You don’t want your paint too runny so that it spreads all over your fabric, but you also don’t want it too clumpy and hard to brush on. If it gets too clumpy, add more dye! If it’s too runny, add more powder! Easy peasy. You can read up more on troubleshooting and using this thickener here.
Time To Paint!
You’ve got your fabric- check! You’ve got your thickened marigold dye- check! The time has come, my friend. Let’s paint!

Painting on linen with my thickened dye.
Lay out your fabric on a flat, protected surface. I laid down some brown paper bags on my kitchen table. Grab your thickened dye and a paint brush and get to painting! When you’ve painted to your heart’s desire, let the fabric dry completely.

Some of my painted playsuit pattern pieces, dried and ready for my iron bath!
Once dry, you can throw the fabric in the wash on a cold cycle or manipulate the color even further. For my playsuit, my fabric took a quick dip in an iron bath before I threw it in the wash. The reason I did that was to not only shift the color from a yellow to a brownish-grayish tone, but also to really ensure that my natural color lasts on my fabric (mordanting). I dipped my fabric in a very mild, cold iron bath for about 1 minute. The iron bath only shifts the color of the stripes and leaves the unpainted portions of my fabric undisturbed.

Dipping my painted fabric into my iron bath. I have about 1 gallon of water and less than 1 tsp of iron powder in here. A little goes a long way! Crazy to see how much the color shifted in just 1 minute!
Another option that you have to ensure color fastness (how long your dye color lasts) is to dip the fabric in a cold alum bath. This mordant will help to seal the dye on your fabric but not shift the color from yellow to gray.
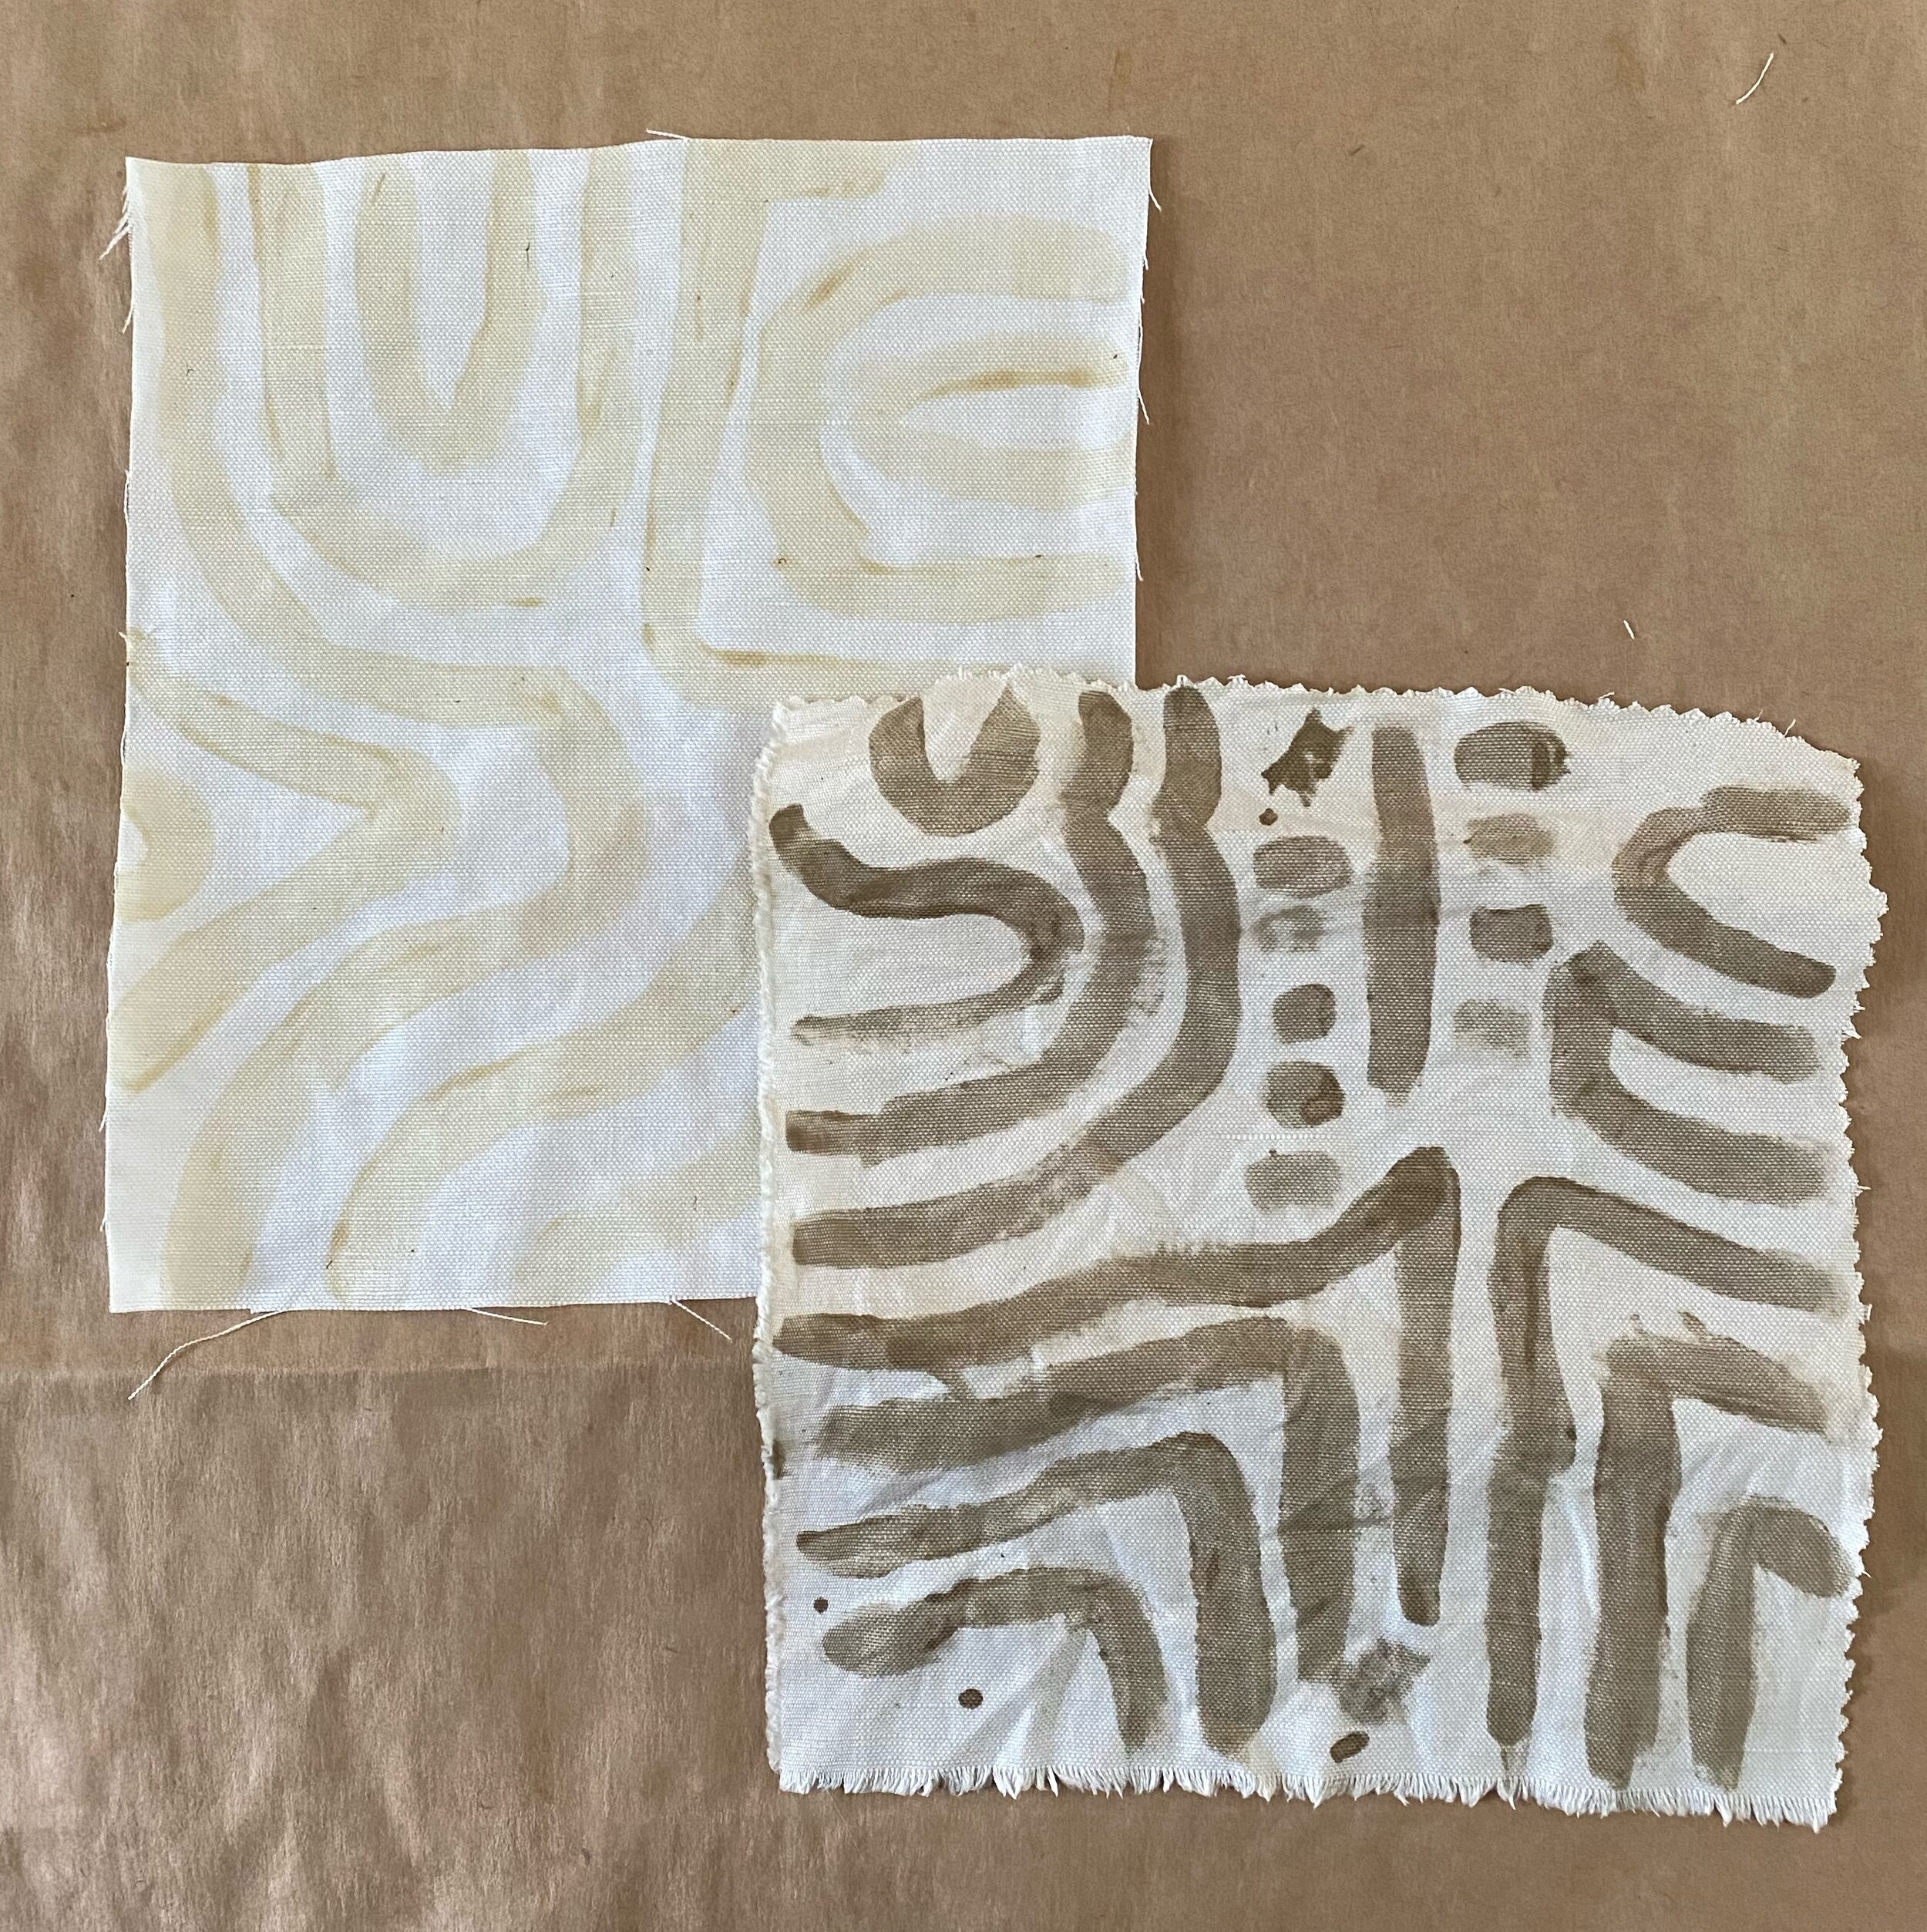
Painted fabric on top left, painted fabric after a dip in an iron bath on the bottom right.

If you don’t have alum handy, the marigold dye will stay after washing. I just don’t know for how long… Here’s an example of unmordanted fabric unwashed (left top layer) and washed (right bottom layer). Not too much of a difference and no washing away—hooray!!
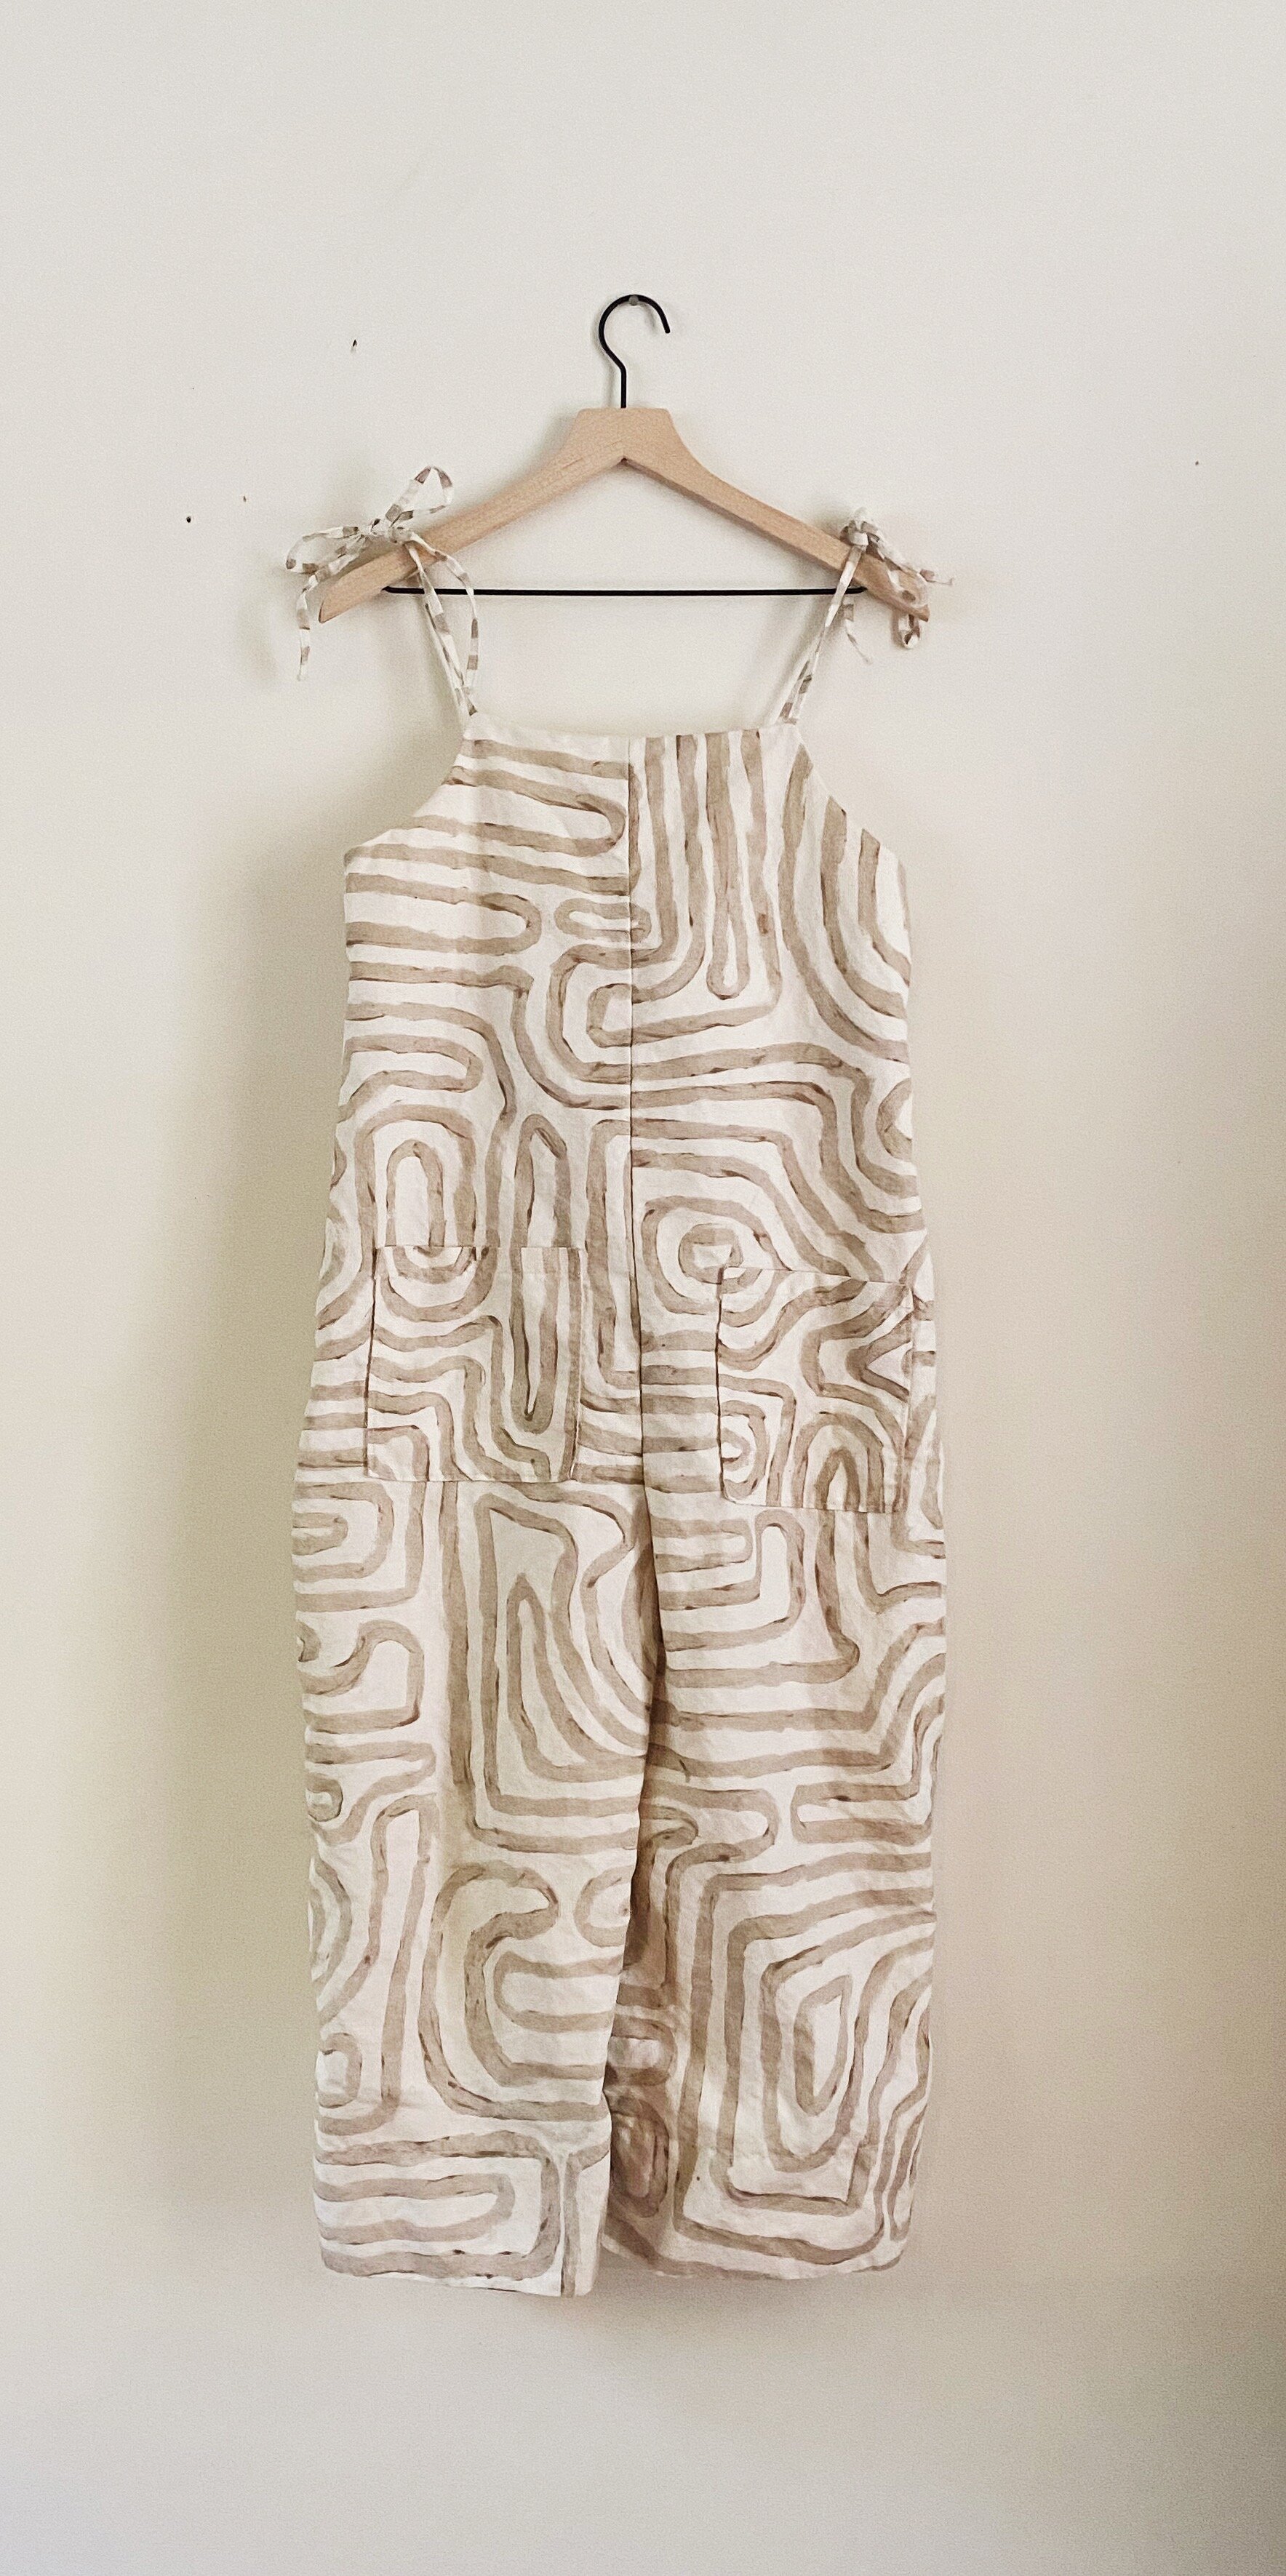
My finished In the Folds Playsuit featuring my hand painted linen fabric! What a dream!
And there you have it, friends! I hope this inspires some fun summer activities while we’re all stuck at home. Holler at me with any questions or to share your projects! I’d love to see what you make!
-KB